The best time to upgrade insulation is when the walls, attic or floor are already open. Air sealing, new insulation and moisture control are far cheaper to do properly when the building envelope is exposed than to retrofit later. Energy Star says integrating insulation into a larger project, such as re-siding or gutting an attic, is the most effective approach. This guide covers what to upgrade, in what order, and what to ask your contractor, with a Mid-Atlantic focus.
TL;DR
- Do insulation during the remodel, not after: open walls and attics make air sealing and higher-performance insulation easier.
- Seal air leaks first. Insulation slows heat transfer but does not stop airflow.
- Never bury wet, moldy or compressed old insulation under new material.
- The federal 25C insulation tax credit ended for work placed in service after December 31, 2025, so budget without it. Utility programs may still help.
- Ask your contractor to plan insulation, ventilation and permits as one system.
Table of Contents
- Why a remodel is the right moment
- Start with air sealing, not insulation
- Where to upgrade insulation, area by area
- Before you add more: check what is already there
- Ventilation and moisture: the part that gets skipped
- Money: the tax credit has ended, but incentives may remain
- A practical sequence for your remodel
- Our perspective: treat the envelope as part of the design
- How Axenia Construction can help
- FAQ
- Sources
Why a remodel is the right moment
Most homeowners think of insulation as a separate purchase. In practice, it is a trade that sits between demolition and drywall. When we gut a kitchen wall, open an attic floor or strip siding, we can see the framing, the gaps around pipes and wiring, and the places where air moves freely. Once drywall goes back up, those spots are hidden again.
The cost logic is simple. Demolition, access, scaffolding, disposal and finishing are already in the remodel budget. Adding insulation to that scope means paying mostly for materials and installation labor, not for opening and repairing finished surfaces a second time. A UK-based guide to retrofit timing for owners makes the same point: walls, roofs and attics are easiest to improve while they are exposed. The building codes differ from ours, but the logic carries over.
There is also a comfort argument. Finished attic rooms, additions over garages and older rooms with cold walls are the spaces where people feel the difference most, and they are usually the spaces being remodeled.
Start with air sealing, not insulation
If you remember one rule from this article, make it this one: seal the leaks before you fill the cavities. The U.S. Department of Energy’s Building America guide to air sealing treats the house as a system, where adding insulation and sealing leaks improves comfort and durability, but every change affects the rest of the building.
Insulation resists heat flow. It does not stop air. A wall full of fiberglass with open gaps at the top plate still leaks, and that moving air can carry moisture into places it should not be. The result can be persistent damp, ice dams in winter, and insulation that never performs to its R-value rating.
During a remodel, air sealing usually means:
- Sealing around wiring, plumbing and duct penetrations in attic floors and top plates.
- Closing gaps around chimneys and flues with approved fire-rated materials.
- Sealing rim joists and the transition between foundation and framing.
- Caulking or foaming around window and door rough openings before trim goes on.
- Making sure the air barrier is continuous, so it lines up with the insulation (what building scientists call aligning the thermal layer with the air barrier).
Energy Star notes that attic air sealing is generally a challenging DIY project, and that a major renovation may be a great time to tackle it. We agree. It is detail work, and it is easy to miss spots when you cannot see the whole attic floor.
Where to upgrade insulation, area by area
Not every remodel touches every part of the house. Here is how we think about the common scopes.
Attics and finished attic rooms
The attic is usually the highest-return location. For homes in our Climate Zone 4 region, the Department of Energy’s guidance, summarized in its insulation and air-sealing essentials, points to R49 to R60 for uninsulated attics. Check your own target against current local code and your contractor’s assessment, since existing insulation and ventilation change the answer.
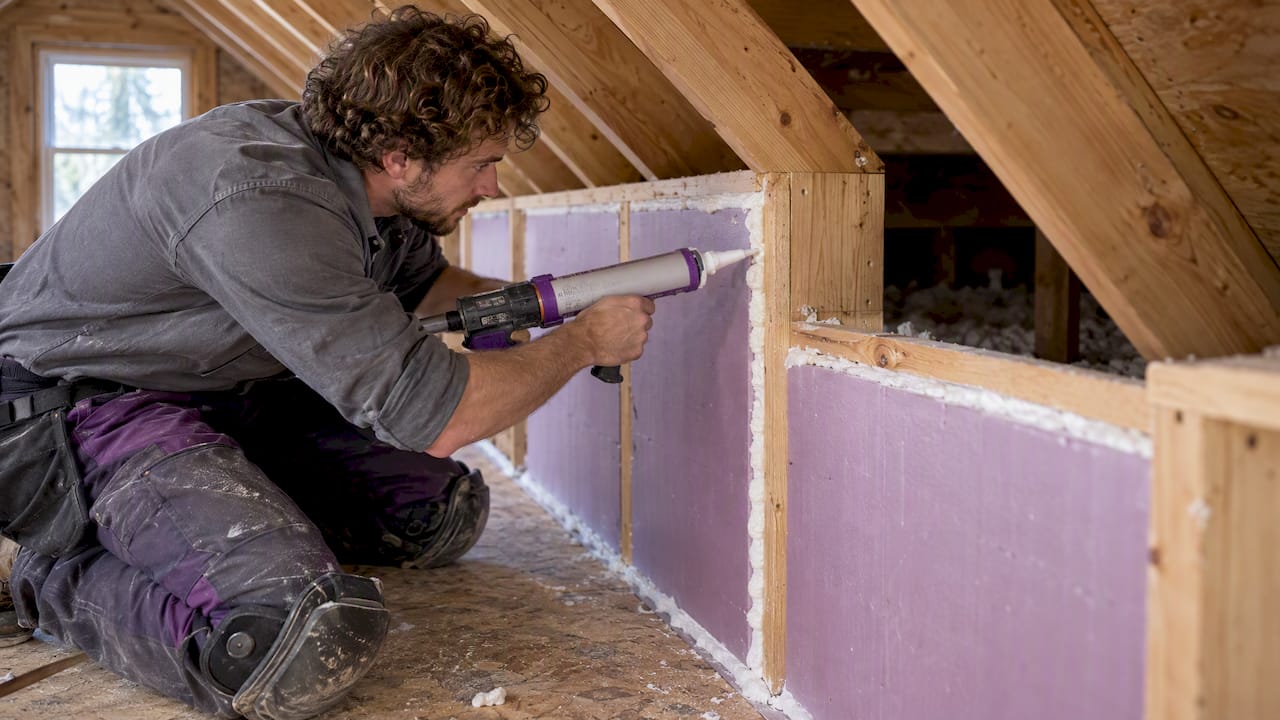
Finished attics have a hidden problem: kneewalls. These short walls beside sloped ceilings are often uninsulated and poorly sealed, and they create a thermal bypass into the unconditioned space behind them. The same Building America report describes treating them with rigid foam sealed at the edges. If you are converting or refinishing an attic, our team can plan this during framing. See how we approach attic conversions in Fort Washington, MD.
Exterior walls
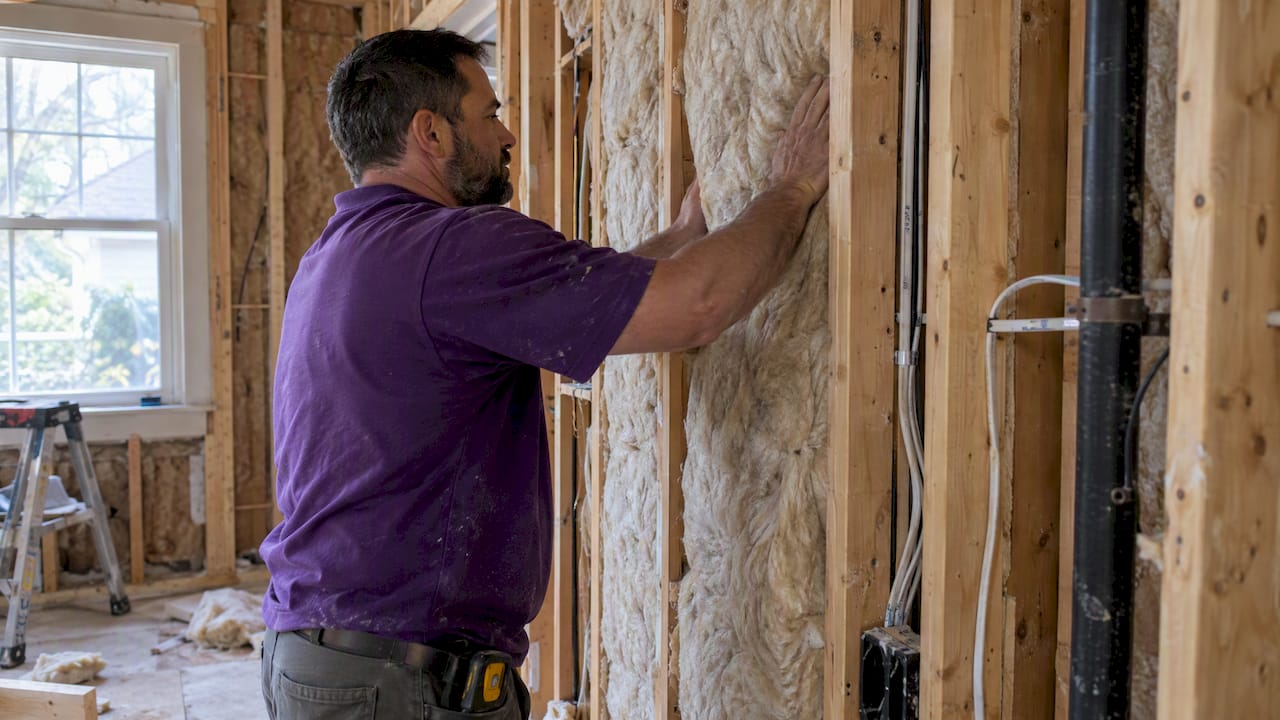
If you are gutting a room to the studs, or re-siding, you have the best chance to improve wall performance. Options include:
- Cavity insulation (batts, blown-in or spray foam) between studs.
- Continuous rigid foam over sheathing or over masonry before drywall, which reduces thermal bridging through the framing.
- A combination, such as cavity fill plus a layer of continuous insulation, for the best result.
DOE guidance for uninsulated 2×4 wood-frame walls in our zone cites R20, or R13 plus R5 continuous insulation. Whichever route you choose, the assembly has to handle moisture. Where the wall can dry matters as much as how thick the insulation is.
Basements and crawl spaces
Basement finishing is one of the best times to insulate, because you are framing and finishing the space anyway. Foundation walls, rim joists and floors above crawl spaces all lose heat, and they are also where moisture is most likely to show up. If a basement project is on your list, our Maryland basement finishing cost guide explains permits, egress and who to hire, and our page on finished basement remodeling in Rockville shows how it fits into a whole-home plan.
Kitchens, baths and additions
Kitchen and bath remodels often open exterior walls, especially when you move a window, relocate a vent or run new plumbing. That is the moment to fix cold walls and air leaks. Bathrooms also need proper exhaust ventilation so the moisture you generate leaves the house, and our bathroom remodel cost guide for Maryland covers permits and ventilation. Additions should be insulated and sealed from day one, because they are new envelope you control completely.
Windows and doors
New windows are only part of an envelope upgrade. The gap between the window frame and the framing needs careful sealing and flashing, or the window’s performance is wasted. If windows are on your list, see our page on energy-efficient window replacement in Potomac.
Before you add more: check what is already there
A common assumption is that you can lay new insulation over the old and be done. Sometimes that works. Often it does not. The DOE’s insulation and air-sealing guidance is clear that the work should meet a proper standard for the climate, and in our experience the existing condition decides whether over-laying is safe.
Before adding anything, we look for:
- Moisture: Stains on sheathing, damp or matted insulation, musty smell.
- Mold or rot: Dark growth on framing or the underside of roof decking.
- Compression: Old batts that are flattened lose much of their effectiveness.
- Pests: Droppings, nesting and tunneling that need to be cleaned out first.
- Ventilation: Soffit vents blocked by insulation, or ridge and gable vents that cannot move air.
- Wiring and recessed lights: Old fixtures that are not rated to be covered.
If you find any of these, the old material comes out, the cause gets fixed, and then the new insulation goes in. Over-insulating on top of a moisture problem can trap damp and create repairs that cost far more than the inspection would have.
Ventilation and moisture: the part that gets skipped
The Building America guide to energy efficiency measures in remodeling describes how programs such as Home Performance with ENERGY STAR focus on the building envelope, where there is a chance to air seal and insulate. The flip side is that a tighter house needs a plan for fresh air and moisture. In practice that means:
- Working bath and kitchen exhaust fans that vent outdoors, not into the attic.
- Clear soffit-to-ridge airflow in vented attics.
- A continuous air barrier so humid indoor air does not leak into cold cavities.
- Combustion appliances checked for safe venting after the house gets tighter. Ask your HVAC professional about this if you have a gas furnace or water heater.
Energy Star frames it as a whole-home approach: a well-sealed and properly insulated attic is one of the most important parts of an ENERGY STAR Home Upgrade, but it is one part of a system.
Money: the tax credit has ended, but incentives may remain
You will see older articles saying the federal insulation credit runs through 2032. Do not rely on them. The IRS energy-efficient home improvement credit page says the credit applied to improvements made through December 31, 2025, and the IRS FAQ on the 2025 legislation says it is not allowed for property placed in service after that date. If you finished work in 2025, you may still claim it on that year’s return. Talk to your tax preparer.
For 2026 projects, look at utility programs. Many homeowners in Maryland, DC and Virginia can reach local rebates through utility-run home performance programs, which often require a professional energy assessment first. Maryland’s program is in flux: Maryland Matters reported in March 2026 that legislators were considering temporary cuts to EmPOWER Maryland, which gives many customers rebates on insulation and air sealing. Before you sign a contract, confirm with your utility what is currently offered, and whether the assessment must happen before work starts. Missing that step can cost you the rebate.

We do not publish fixed prices for insulation scopes, because they depend on the house. We scope and price each project in writing, so you can see exactly what is included.
A practical sequence for your remodel
- Assess first. Get an energy assessment or at least a contractor walkthrough of attic, crawl space and walls before design is final.
- Set the envelope goals. Decide on target R-values and air-tightness for the areas being opened.
- Check incentives. Confirm utility program rules before demolition.
- Demolish and inspect. Look for moisture, mold, pests and old wiring.
- Fix problems. Repair leaks, remove damaged material, correct ventilation.
- Air seal. Seal every penetration and gap you can reach.
- Insulate. Install to manufacturer specifications with no gaps, voids or compression.
- Inspect before cover-up. Have the work reviewed before drywall. Local inspectors may require this.
- Close up and finish. Drywall, siding, paint, trim.
Our article on sequencing energy-efficient remodel upgrades goes deeper on ordering the trades, and our Maryland remodeling tips for 2026 place insulation in the broader plan.
Our perspective: treat the envelope as part of the design
We are a women-owned general contractor in Rockville, and the mistake we see most often is insulation being decided last. By then, the layout is fixed, the electrician has run wire through the cavities, and the budget has been spent on finishes. Homeowners then ask for a quick fix, and we have to explain that the opportunity was earlier.
Our view is that insulation belongs in the design conversation on day one. That is why we like design-build: the person drawing the kitchen also knows what is in the wall behind it. We ask the same questions at every walkthrough. Where does air get in? Where can moisture get out? What will be hidden once the drywall is up? We would rather spend an extra day documenting those answers than explain a problem to you in two winters.
We also believe in telling you plainly when insulation is not the best use of your money. If the roof is leaking or the attic is damp, that comes first. Local permitting in Maryland, DC and Northern Virginia is part of our daily work, and we handle it so your upgrade is inspected and documented, which matters when you sell.
— Arienne
How Axenia Construction can help
If you are planning a renovation and want insulation, air sealing and ventilation handled in the same scope, we can manage it as part of your home renovation or through our design-build service. For multi-trade projects, our general contracting team coordinates framing, mechanical, insulation and finishes under one schedule, with clear communication at each step. Tell us about your house and we will walk it with you.
FAQ
Can I just lay new insulation over old insulation?
Sometimes, if the old material is dry, clean, uncompressed and the air barrier beneath it is sealed. If it is wet, moldy, pest-damaged or flattened, remove it first. Adding more on top of a moisture problem can trap damp and lead to costlier repairs.
Is a remodel really the best time to upgrade insulation?
Usually yes. Energy Star points to larger renovation projects as the most effective time, because the envelope is already exposed and air sealing is easier. You also avoid paying to open and repair finished surfaces a second time.
Is there still a federal tax credit for insulation?
Not for work placed in service after December 31, 2025, according to the IRS. Work completed in 2025 may still be claimed on that year’s return. For 2026 work, check utility rebate programs and ask a tax professional about your situation.
Do I need to air seal before adding insulation?
Yes. Air sealing comes first, because insulation does not stop air movement. Skipping it can lead to moisture problems, ice dams and poor performance whatever the R-value on the bag.
What R-value do I need in Maryland, DC or Virginia?
Most of the region falls in Climate Zone 4, where DOE guidance points to R49 to R60 for uninsulated attics. Local code and your home’s construction set the final number, so have your contractor confirm it before design is final.
Sources
- Energy Star: Attic insulation project
- Energy Star: Attic air sealing project
- Energy Star: Well-insulated and sealed attic
- DOE Building America: Air sealing guide
- DOE Building America: Efficiency measures for remodeling
- DOE: Insulation and air-sealing essentials
- IRS: Energy efficient home improvement credit
- IRS: FAQs on 2025 legislation changes to energy credits
- Maryland Matters: EmPOWER Maryland rebate cuts