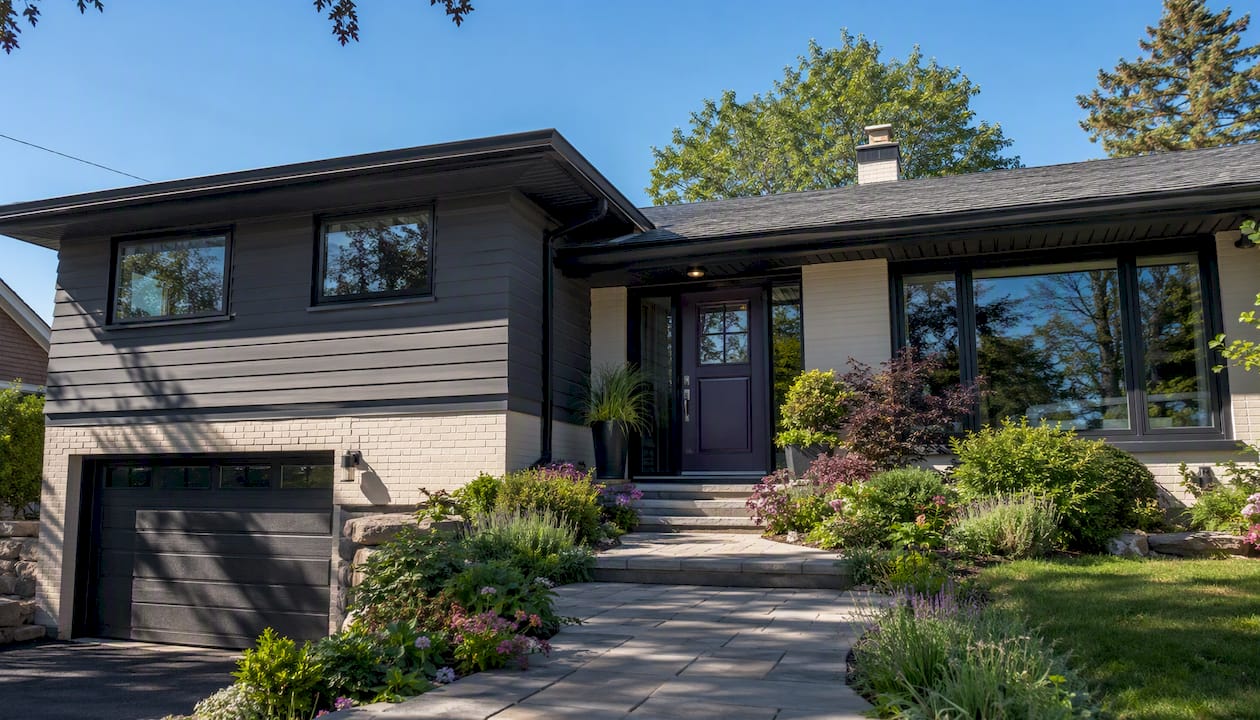
The six highest-impact moves for split-level home curb appeal are: upgrading the front entry and door, replacing the garage door, applying targeted siding and paint with deliberate color-blocking, defining the landscaping and walkway, adding modern lighting and house numbers, and refinishing the railings and exterior steps. Together, these updates work with the staggered geometry of a split-level rather than against it, and the payoff is real. Research from the University of Texas at Arlington shows that strong curb appeal adds an average of about 7% to a home’s sale price, with premiums reaching 10–11% in slower markets.
Here is where to start, with rough budget tiers:
- Front entry and door upgrade — Medium ($1,000–$6,000)
- Garage door replacement — Medium ($1,000–$6,000)
- Siding, paint, and trim color-blocking — Low to High (under $1,000 for paint refresh; $6,000+ for full siding)
- Landscaping and walkway definition — Low to Medium (under $1,000 for DIY; $1,000–$6,000 for hardscaping)
- Lighting and house numbers — Low (under $1,000)
- Railings and exterior step refinements — Low to Medium (under $1,000 for paint/refinish; $1,000–$6,000 for replacement)
Pick one visible element you can update this weekend: swap the front door hardware, add a new light fixture, or plant a defined border along the walkway.
Key Takeaways
Strong curb appeal on a split-level home comes from working with the staggered geometry, not against it, with the entry and garage door as the highest-priority visual anchors.
| Point | Details |
|---|---|
| Entry and garage door first | Updating these two elements together produces the most visible before-and-after contrast per dollar spent. |
| Color-blocking beats camouflage | Use a primary neutral on the dominant level and a contrasting mid-tone on the secondary level to make the split look intentional. |
| Curb appeal adds measurable value | UTA research shows strong curb appeal adds an average of 7% to sale price, rising to 10–11% in slower markets. |
| Phase structure before planting | Complete hardscaping and entry work before landscaping to avoid disturbing new plantings during contractor work. |
| Axeniaconstruction for multi-trade projects | Axeniaconstruction coordinates exterior painting, siding, portico construction, and hardscaping for split-level homeowners in DC, Maryland, and Virginia. |
Table of Contents
- Which split-level curb appeal projects give you the most visual return?
- How do you design a split-level exterior that looks intentional?
- What materials and colors work best on a split-level facade?
- How should you phase the work and when do you need a contractor?
- How do windows, trim, and shutters change a split-level’s street presence?
- Ready to move forward? Here is how a contractor can help
- Sources
Which split-level curb appeal projects give you the most visual return?
The projects that move the needle fastest are those that address the “face” of the home: the entry zone, the garage door, and the paint or siding treatment that ties the two levels together visually. Landscaping and lighting amplify those anchors. Railings and steps matter because they are the first things a visitor physically interacts with.
Before you start any project, photograph the front of your home from the street at the same time of day you would show it to a buyer. Capture the full facade, the entry close-up, the driveway approach, and the side angles. These before shots are your baseline for measuring visual progress and for communicating scope to contractors.
Pro Tip: Stage your projects to unify the facade before spending on details. Update the garage door and front entry in the same phase so the two dominant visual anchors read as a coordinated pair from the street. Doing them separately, months apart, often leaves the facade looking half-finished.
How do you design a split-level exterior that looks intentional?
The most common mistake split-level homeowners make is trying to visually flatten the facade, using the same color and material across all levels to minimize the stagger. That approach rarely works. The levels read as awkward interruptions rather than a deliberate design choice.
The better move is to accept the geometry and use it. Treat each level as a distinct visual zone, then connect them with consistent trim, window accents, and a strong vertical anchor at the entry. A portico or framed front door pulls the eye to a single focal point and gives the facade a hierarchy it otherwise lacks. According to House Beautiful’s split-level design guide, split-levels typically feature staggered half-levels with a main entertaining level, an upper bedroom level, and a lower den and garage zone. Each of those zones is a design opportunity, not a problem to hide.
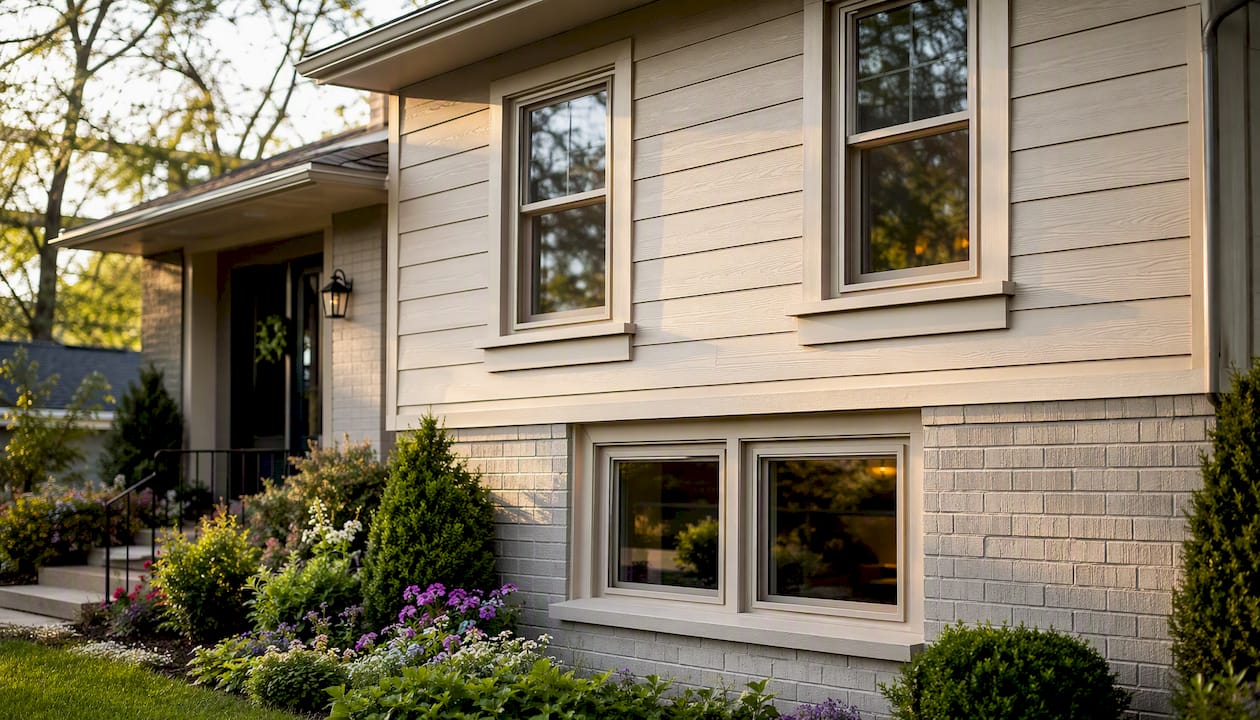
Color-blocking by level is the most practical technique. Use a primary neutral (warm greige, soft white, or deep charcoal) for the dominant level, then apply a contrasting mid-tone to the secondary level. Mixing textures reinforces the separation: horizontal fiber-cement siding on the upper level paired with a brick or stone accent band on the lower level creates depth and visual interest that reads clearly from the street.
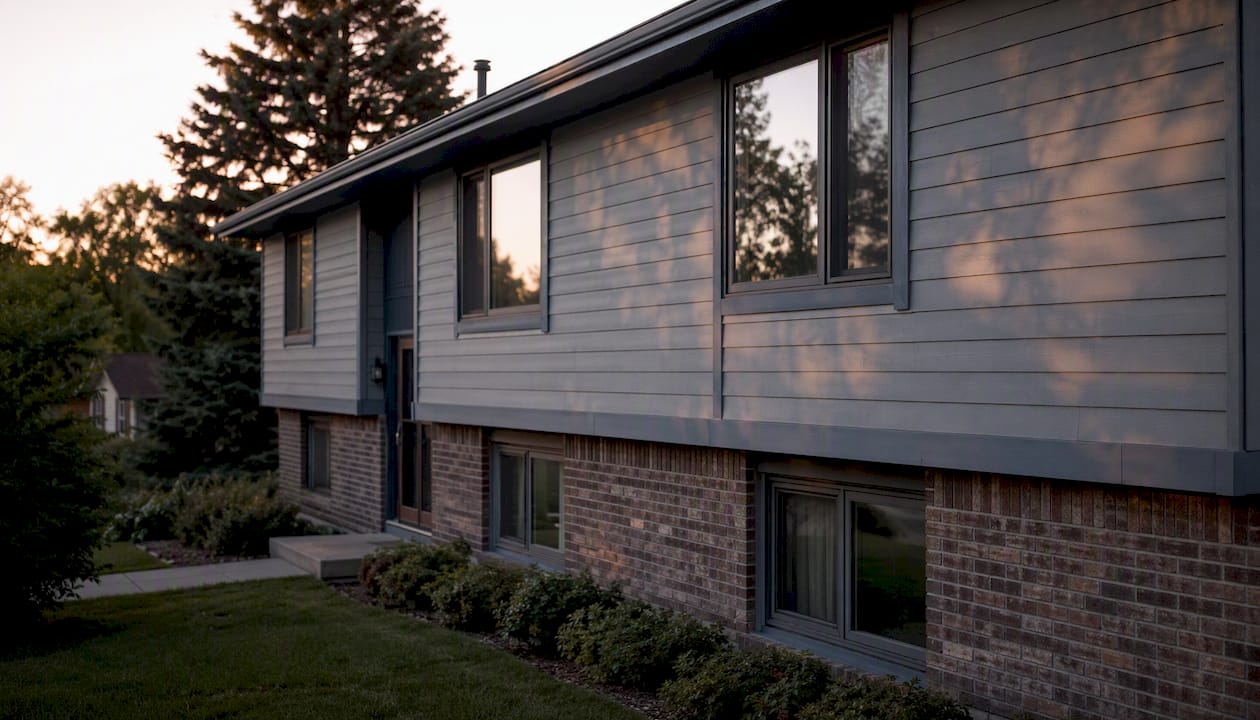
Reporting on the UTA curb-appeal study at Phys.org confirms that a tidy, inviting entry reduces perceived buyer risk and supports higher sale prices, with the premium growing in slower markets. That finding points directly to the entry zone as the highest-priority investment on any split-level facade.
Pro Tip: Address the roofline visually with consistent fascia and soffit paint, and align window trim weights across both levels. Matching the trim profile on upper and lower windows creates a horizontal thread that ties the levels together without any structural change.
What materials and colors work best on a split-level facade?
Fiber-cement siding (James Hardie is the most widely specified brand) and engineered wood siding both perform well on split-level exteriors because they hold paint cleanly, resist moisture, and are available in profiles that complement midcentury forms. Brick accent bands on the lower level are a natural fit for the architecture, adding a grounded, permanent quality that paint alone cannot replicate. For trim, composite or PVC profiles resist rot and hold their finish longer than wood, which matters on a facade with multiple exposure angles.
Color strategy for a split-level works best in three layers. First, choose a primary neutral for the largest surface area. Second, select a contrasting mid-tone for the secondary level or accent band — a warm taupe against a cool gray, or a deep navy against a light cream. Third, reserve a bold accent for the front door, the portico columns, or the garage door trim only. That third color should appear in no more than two or three places on the facade, or it loses its punch.
Finish details that read well from the curb include:
- Window trim width: 3.5–4 inches reads as modern and intentional; thinner profiles disappear at distance.
- Shutters: Remove non-functional shutters that do not match the window size. They date the home and add visual clutter. The Spruce’s guide to modernizing split-level exteriors specifically calls out removing dated shutters as one of the most effective cosmetic moves.
- House numbers: Oversized, brushed-metal numbers mounted on a contrasting panel are a low-cost, high-visibility upgrade.
- Light fixtures: Replace builder-grade brass or black lanterns with a fixture that matches the door hardware finish.
Budget-minded swaps include painting the existing garage door a modern color (charcoal, navy, or black) rather than replacing it, and adding window trim with PVC boards rather than replacing the windows themselves. Premium upgrades are full siding replacement and a built portico with a shed or gable roof.
Pro Tip: Before committing to an exterior paint color, order large sample boards (at least 12 by 24 inches) and mount them on the actual facade for three to five days. Light changes dramatically between morning and late afternoon on a staggered exterior, and a color that looks right on a small chip often reads differently at scale.
How should you phase the work and when do you need a contractor?
Prioritize the visual anchors first: the front entry, the garage door, and the paint or siding treatment. These three categories produce the most visible change per dollar spent and set the tone for every subsequent update. Landscaping and hardscaping come next because they frame the anchors. Lighting, railings, and detail refinements are the final phase.
Seasonal timing matters. Exterior painting has a practical window of late spring through early fall in most climates, when temperatures stay between 50°F and 90°F and humidity is manageable. Siding replacement can happen year-round in mild climates but should avoid freezing temperatures. Landscaping installation is most successful in spring and early fall when soil conditions support root establishment.
| Task | Hire or DIY? | Permit Likely? | Complexity |
|---|---|---|---|
| Front door replacement | DIY or hire | No | Low |
| Portico or entry addition | Hire | Yes | High |
| Garage door replacement | Hire | Sometimes | Low–Medium |
| Exterior painting | Hire for best results | No | Medium |
| Siding replacement | Hire | Yes | High |
| Walkway and hardscaping | Hire for large scope | Sometimes | Medium |
| Landscape planting | DIY-friendly | No | Low |
| Railing replacement | Hire if structural | Sometimes | Medium |
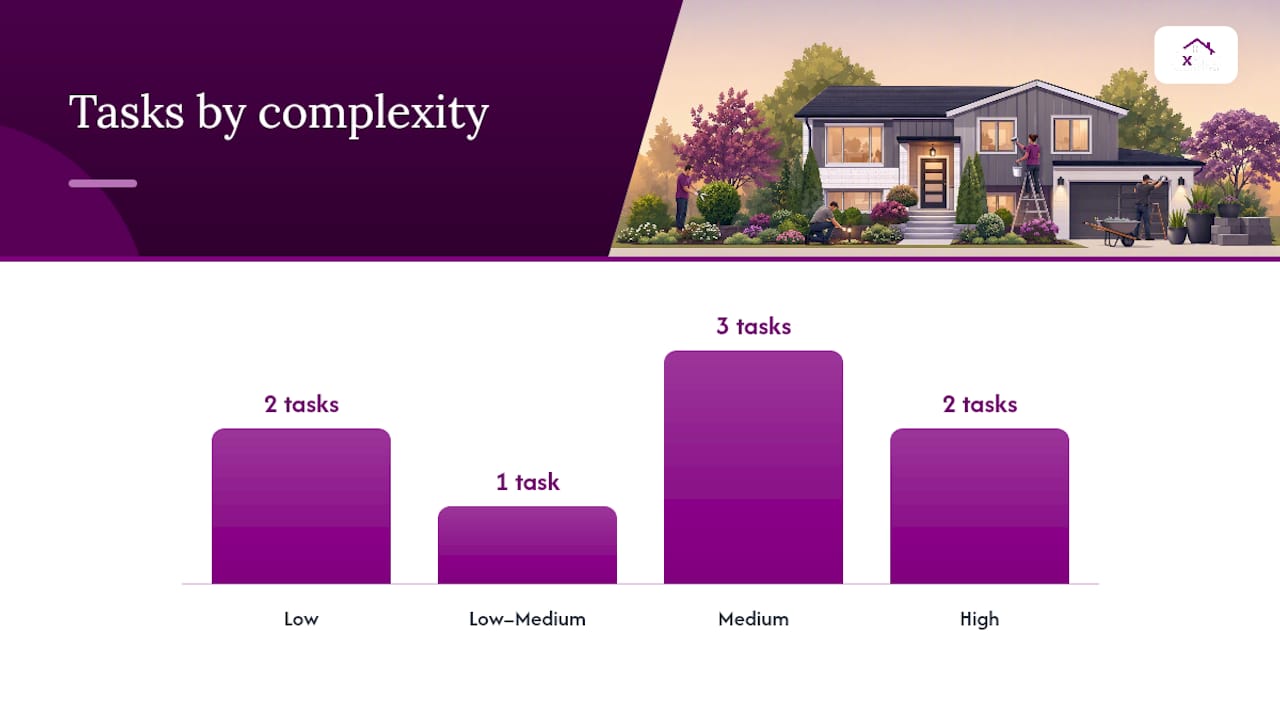
For budget priorities and renovation ROI guidance, industry analysis consistently points to high-visibility exterior items first. The biggest line items in a split-level curb-appeal project are typically siding replacement, a portico addition, and hardscaping. Get competitive bids from at least three licensed contractors for any project over $5,000, and ask specifically for examples of split-level exterior work.
Pro Tip: Schedule the garage door replacement and front entry work in the same contractor mobilization. Combining them reduces setup costs and lets you coordinate finishes in a single decision-making session rather than two separate ones.
How to keep your split-level looking sharp through every season
Regular maintenance preserves the condition signals that appraisers and buyers notice first. A well-kept exterior communicates that the interior received the same attention, which supports both offer prices and appraisal adjustments.
Work through the year with these seasonal priorities:
Spring: Prune foundation shrubs back from the siding and windows, refresh mulch beds (2–3 inches is the standard depth), clean the walkway and driveway with a pressure washer, and inspect the entry steps and railings for winter damage. Touch up any paint chips before moisture works into the substrate.
Summer: Check irrigation coverage for planted borders, deadhead flowering plants along the walkway, and clean the gutters if spring tree debris has accumulated. Inspect caulking around windows and the garage door frame.
Fall: Clear leaves from the roof, gutters, and hardscapes before they mat and stain. Inspect the roof and flashing for any damage before winter. Apply a fresh coat of sealant to concrete steps and the driveway if they show surface wear. Bob Vila’s guidance on split-level curb appeal pairs cosmetic updates with weather-resistance improvements for exactly this reason: visible condition signals matter to buyers.
Winter: Use calcium chloride or sand rather than rock salt on steps and walkways to protect concrete and adjacent plantings. Store seasonal decor promptly after the holiday period. Decor left out past its season reads as neglect from the street, which undercuts the investment you made in the rest of the facade.
Pro Tip: A fresh coat of paint on the front door and a new doormat cost under $100 combined and take two hours. Do it every spring. It is the single fastest reset for street presence.
Pre-project checklist: what to confirm before you start
Clarify your primary objective before spending a dollar. Are you preparing to sell, modernizing for your own enjoyment, or addressing deferred maintenance? The answer changes which projects to prioritize and how much to spend.
Work through these questions before requesting bids or buying materials:
- What is my hard budget ceiling, and which single project would I fund if I could only do one?
- What is the current condition of the siding, trim, and steps? Are there rot, moisture damage, or structural issues that must be addressed before cosmetic work?
- Does my municipality require permits for the work I am planning? (Portico additions, structural railing replacements, and hardscaping that affects drainage often do.)
- Are there drainage or grading issues near the entry or driveway that will undermine new hardscaping?
- Does anyone in the household have mobility or accessibility needs that should shape the entry and step design?
When vetting contractors, ask for proof of current general liability insurance and licensing in your state, references from at least two comparable split-level exterior projects, and a written scope of work that specifies materials by brand and profile. Collect photos of the full facade, close-ups of the entry, garage door, steps, and any damaged areas, plus rough measurements of the facade width and entry landing before your first contractor meeting.
Pro Tip: Ask your contractor whether the planned work will require a homeowners association approval or a local historic review. In many neighborhoods, exterior color changes and structural additions need written approval before work begins. Finding out after the fact can mean costly reversals.
How do windows, trim, and shutters change a split-level’s street presence?
Windows are one of the most underestimated levers in split-level home design. Because the facade has multiple levels, the window arrangement on each level is visible simultaneously from the street, and inconsistent trim profiles or mismatched shutter treatments make the facade look assembled rather than designed.
The most effective approach is to standardize the trim profile across all windows on the facade. If the upper level has 3.5-inch flat-casing trim, the lower level should match it. This horizontal consistency creates a visual thread that connects the levels without any structural modification. Adding a simple sill extension below each window (a 1-by-6 or 1-by-8 board painted to match the trim) adds depth and shadow lines that read as architectural detail from the street.
Shutters deserve a direct assessment. Functional shutters that actually cover the window opening and are mounted on working hardware can be a strong design element, particularly on a midcentury split-level where they reinforce the period character. Non-functional shutters that are too narrow for the window, mounted flat against the siding, or in a dated color are worth removing entirely. The wall surface behind them is almost always in better condition than the surrounding siding, so removal typically reveals a clean substrate that paints well.
Window replacement itself is a larger investment ($400–$900 per window installed is a common range), but it is not always necessary for curb appeal. In many cases, new exterior trim, fresh paint, and the removal of dated shutters produce a comparable visual improvement at a fraction of the cost. Reserve full window replacement for units that are visibly damaged, fogged between panes, or significantly out of proportion with the facade’s updated design direction.
A contractor’s honest take on split-level exterior work
The single most reliable move we see on split-level modernization projects is updating the garage door and anchoring the entry simultaneously. Those two elements make up the majority of the visual “face” of a split-level from the street, and updating them together produces a before-and-after contrast that is immediately legible to anyone driving past.
What most Pinterest boards miss is the sequencing logic. Homeowners often start with landscaping because it feels approachable, but planting before the hardscaping and entry work is done means you will likely disturb the beds when the contractors arrive for the bigger work. The right order is structure first, then surfaces, then planting.
The other thing practitioners know that design articles rarely say plainly: color samples on a chip are almost useless for a split-level facade. The staggered geometry creates multiple shadow angles, and the color you choose for the upper level will read differently than the same color on the lower level at the same time of day. Large-scale mockups mounted on the actual facade for several days are not optional on a two-tone color-blocking scheme. They are the difference between a cohesive result and an expensive repaint.
Split-levels with clear midcentury appeal are attracting strong buyer interest in some markets, with well-styled examples selling significantly over asking. The architecture is not a liability. Treated with intention, it is a genuine selling point.
Ready to move forward? Here is how a contractor can help
Split-level exterior work spans multiple trades: carpentry for the entry and portico, siding and painting crews, a garage door installer, a hardscaping team, and sometimes a structural engineer for railing or step replacements. Coordinating those trades yourself is manageable for a single-trade project, but when you are running two or three simultaneously, the scheduling complexity grows fast.
Axeniaconstruction handles the full scope of exterior renovation for split-level homeowners in the DC, Maryland, and Virginia area: exterior painting and siding replacement, porch and portico construction, garage door coordination, hardscaping and walkway work, and landscaping coordination. We manage permitting, trade scheduling, and material selection so you are not spending weekends chasing subcontractors. Our home renovation services cover everything from a focused entry upgrade to a complete facade overhaul, and we bring the same attention to detail to a $3,000 entry project as we do to a full exterior renovation. To see which curb appeal improvements fit your budget, browse our project examples or reach out directly to request a consultation and written estimate.
Sources
- 14 Ways to Modernize a Split-Level Home Exterior — The Spruce
- Split-level house design guide — House Beautiful
- Split-levels are making a comeback in parts of the market — The Boston Globe
Recommended
- Curb Appeal Enhancements in Washington, DC: Increase Home Value with Smart Exterior Upgrades – Axenia Construction
- Examples of Curb Appeal Improvements for Every Budget
- Best Home Renovations to Increase Property Value in 2026 – Axenia Construction
- Top Home Remodeling Tips in Maryland for 2026: Boost Value & Comfort – Axenia Construction