
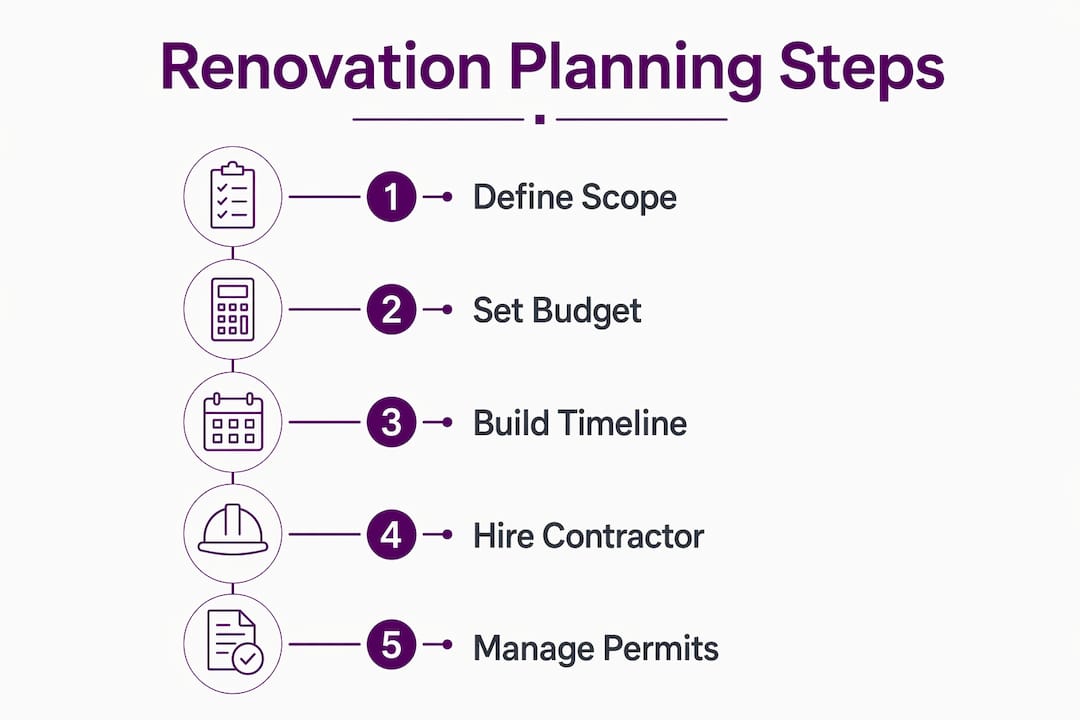
A home renovation project planning guide is the structured framework homeowners use to define scope, set budgets, schedule timelines, hire contractors, and manage permits before a single wall comes down. Most renovation failures trace back to decisions made before construction starts, not during it. The difference between a project that finishes on time and one that bleeds money for months is almost always the quality of pre-construction planning. This guide walks you through every critical phase, from writing your first scope statement to signing your final punch list, using 2026 best practices for contingency budgeting, milestone payments, and material lead times.
What does a home renovation project planning guide actually cover?
A home renovation project planning guide covers six core disciplines: scope definition, budget structuring, timeline scheduling, contractor selection, permit management, and materials procurement. Miss any one of them and the others collapse. Think of these disciplines as load-bearing walls in your plan. Remove one and the whole structure shifts.
Renovation success depends on quality pre-construction decisions far more than on adjustments made during construction. That means the hours you spend planning before breaking ground are worth more than any amount of problem-solving on-site. Homeowners who skip this phase typically face cost overruns, contractor disputes, and timelines that stretch from weeks into months.
The home improvement planning process also requires you to think about sequencing. Structural work comes before mechanical rough-ins. Rough-ins come before drywall. Drywall comes before finishes. Getting that order wrong costs real money in rework and idle labor.
How to clearly define your renovation scope before starting
Defining your renovation scope with a written problem statement is the single biggest predictor of cost and timeline accuracy. Without it, every contractor you approach will price a different project, and you will have no way to compare their bids.

Start by writing one paragraph that describes the problem you are solving. “The kitchen layout does not support two cooks, the cabinetry is original from 1987, and the electrical panel cannot support modern appliances” is a scope anchor. It tells you, your designer, and your contractor exactly what success looks like.
Then build your scope list using these categories:
- Rooms in scope: Kitchen, primary bathroom, mudroom
- Rooms out of scope: All bedrooms, living room, basement
- Elements being replaced: Cabinetry, countertops, all plumbing fixtures, lighting
- Elements being reused: Existing hardwood floors, exterior doors
- Finish level decisions: Mid-range cabinetry, premium stone countertops, basic tile in mudroom
- Structural changes: Remove non-load-bearing wall between kitchen and dining room
- Mechanical changes: Relocate gas line, upgrade electrical panel to 200 amps
Identifying layout, structural, envelope, and mechanical changes at this stage prevents the most expensive surprises. A contractor who discovers mid-project that you want to move a gas line will charge a premium for the disruption. One who knew from day one will price it accurately.
Pro Tip: Write your scope document before you contact a single contractor. Send the same document to every bidder. You will get comparable quotes and immediately spot any contractor who is pricing a different project than the others.
How to structure and manage a renovation budget effectively
Budget using ranges, not single-point estimates. A kitchen renovation that costs between $45,000 and $65,000 is an honest budget. One that costs “exactly $52,000” is a fiction that will cause stress the moment the first hidden condition appears.
Group your costs into these categories from the start:
| Cost category | What it includes |
|---|---|
| Structure and envelope | Foundation, framing, roofing, windows, exterior doors |
| Mechanical systems | Electrical, plumbing, HVAC, gas lines |
| Finishes | Flooring, tile, paint, trim, cabinetry |
| Fixtures and appliances | Sinks, faucets, lighting, refrigerator, range |
| Fees and soft costs | Permits, design fees, inspections, dumpster rental |
| Contingency | Minimum 20% of total budget; 25% for homes built before 1980 |
The contingency line is not optional. A 20% contingency covers hidden conditions like rotted subfloor, outdated wiring discovered behind walls, or asbestos in older tile. Older homes warrant 25% because the probability of finding something unexpected behind finished surfaces is significantly higher.
Tracking three cost numbers throughout the project keeps your budget honest: estimated (what you planned to spend), committed (what you have signed contracts or purchase orders for), and actual (what you have paid). When committed costs start approaching your estimated total before construction is halfway done, you have a problem you can still address. Waiting until the invoices arrive is too late.
Pro Tip: Confirm your financing before you finalize your scope. Whether you are using a home equity line of credit, a construction loan, or cash savings, knowing your hard ceiling changes every decision that follows.
How to build a realistic renovation timeline with buffers
Renovation timelines follow predictable phases, and each phase has a typical duration that most homeowners underestimate. Here is the full sequence with realistic durations:
- Goal setting and scope definition: 1 to 2 weeks
- Budget development: 2 to 4 weeks
- Detailed design and drawings: 4 to 8 weeks
- Permit submission and approval: 4 to 6 weeks
- Contractor selection and contract signing: 2 to 4 weeks
- Material ordering and procurement: 2 to 6 weeks
- Construction: 6 weeks to 12 months depending on scope
- Final walkthrough and punch list: 1 to 2 weeks
Add a 2 to 4 week buffer to each phase. Projects involving structural changes or permit-heavy work should start the planning process 6 to 12 months before your target move-in or completion date. That timeline feels long until you realize that design alone can take two months and permit approval can take six weeks in many jurisdictions.
Delays most often come from decision timing and material lead times, not from crew availability. Cabinetry, stone countertops, specialty tile, and appliances can carry 6 to 12 week lead times. If you have not ordered your kitchen cabinets before demolition starts, your contractor will finish the rough-in work and then sit idle waiting for materials. That idle time costs you money in schedule extensions and sometimes in daily rates.
| Phase | Typical duration | Recommended buffer |
|---|---|---|
| Design | 4 to 8 weeks | 2 weeks |
| Permits | 4 to 6 weeks | 2 to 4 weeks |
| Material procurement | 2 to 6 weeks | 2 weeks |
| Construction | 6 weeks to 12 months | 10% of construction duration |
Pro Tip: Order your long-lead items, cabinetry, stone, specialty fixtures, and appliances, before your permit is approved. The permit and the materials will arrive around the same time, and your contractor can start without interruption.
How to select, vet, and hire the right contractor
Get 3 to 5 written bids with itemized cost breakouts, not lump-sum totals. An itemized bid tells you what the contractor thinks the job requires. A lump sum tells you almost nothing and makes comparison impossible.
When evaluating contractors, verify these items before signing anything:
- License: Confirm the contractor holds a current license in your state and jurisdiction
- Insurance: Require certificates of general liability and workers’ compensation insurance, naming you as an additional insured
- References: Call at least three recent clients and ask specifically about budget accuracy, communication, and how disputes were handled
- Job site visit: Visit a current or recently completed project to assess cleanliness, organization, and finish quality
The contract itself is your primary protection. Every renovation contract should include a detailed scope of work, a construction schedule with milestones, a payment schedule tied to those milestones, a written change-order process, and a warranty covering both labor and materials.
A milestone payment structure protects you throughout the project. A typical structure looks like this: 10% deposit at signing, 25% at completion of rough-in, 25% at drywall, 25% at fixture installation, and 15% held back until the final punch list is complete and signed off. That final 15% retention is your leverage to get every last item finished correctly.
Pro Tip: Never pay more than 10% upfront to any contractor. A contractor who demands 50% before starting work is signaling a cash flow problem that will become your problem.
For a deeper look at contractor vetting criteria, Axeniaconstruction has published a detailed breakdown of what separates reliable contractors from risky ones. You can also review reputable contractor qualities from an independent construction industry perspective.
Managing permits, materials, and documentation
Permits are not optional, and they are not just paperwork. They protect you legally, protect your home’s resale value, and protect the workers on your job site. Permits generally take 4 to 6 weeks for approval, and some jurisdictions run longer for structural or system changes.
Follow this sequence for permit management:
- Identify which permits your project requires during the design phase, before you finalize your budget
- Confirm who pulls the permits. Licensed contractors typically pull permits in their name, which also means they are legally responsible for code compliance
- Submit permit applications as early as possible, ideally while you are still finalizing contractor selection
- Confirm all required inspection milestones with your contractor before construction starts
- Keep all permit documentation on-site and accessible throughout construction
For materials, your documentation checklist should include:
- Model numbers and spec sheets for every fixture, appliance, and finish material
- Delivery confirmation dates and storage locations
- Manufacturer warranties and installation requirements
- Receipts and purchase orders organized by cost category
Finalizing long-lead selections before breaking ground is one of the most impactful decisions you can make. Cabinetry, stone, and specialty fixtures ordered late create idle contractor time that costs money and extends your timeline. Document every change order in writing before any work proceeds. Photos taken weekly throughout construction create a record that resolves disputes faster than memory ever will.
Understanding why permits matter for additions and structural changes is worth reviewing before you submit your first application.
Key takeaways
Successful home renovation project planning requires scope definition, contingency budgeting, phased timelines, contractor vetting, and permit management to be completed before construction begins.
| Point | Details |
|---|---|
| Define scope in writing | A written scope document with rooms, elements, and finish levels produces accurate, comparable contractor bids. |
| Budget by range with contingency | Use cost categories and reserve at least 20% for hidden conditions, 25% for older homes. |
| Build buffer into every phase | Add 2 to 4 weeks to each project phase and order long-lead materials before permits are approved. |
| Use milestone payment contracts | Structure payments at construction milestones and hold back 15% until the punch list is complete. |
| Document everything | Weekly photos, written change orders, and organized receipts prevent disputes and protect your investment. |
What I’ve learned from watching renovations succeed and fail
Most homeowners I work with come in thinking the hard part is construction. It is not. The hard part is the four to six months before a single tool touches the building. Scope creep, permit delays, and material shortages do not happen during construction. They happen because decisions were deferred during planning.
The homeowners who finish on budget are almost always the ones who made every finish selection before demolition started. They knew their cabinet color, their countertop edge profile, and their faucet model number before the first wall came down. That level of specificity feels excessive until you see what happens to a project when the contractor is waiting three weeks for a backordered tile that was never confirmed.
I also see homeowners consistently underestimate permitting and material lead times. They plan for a six-week permit turnaround and get twelve. They order appliances in week two of construction and wait eight weeks for delivery. Buffer time is not pessimism. It is accuracy.
Weekly check-ins with your contractor are not micromanagement. Documenting decisions and change orders in writing is not distrust. These practices are the difference between a project that finishes with a handshake and one that ends in a dispute. Keep your contingency fund intact as long as possible. The temptation to upgrade finishes mid-project is real, and it is the most common way homeowners burn through their safety net before the unexpected costs arrive.
— Arienne
Ready to plan your renovation with a team that knows the process?
Axeniaconstruction is a licensed, women-owned general contractor based in Rockville, MD, serving homeowners across the greater Washington, D.C. area, including Alexandria, VA and surrounding communities. From the first scope conversation through final punch list sign-off, Axeniaconstruction manages permits, contractor coordination, material procurement, and quality control so nothing falls through the cracks.

If you are weighing which projects deliver the strongest return, Axeniaconstruction’s guide to high-value renovation projects breaks down the upgrades that add the most to your home’s value in 2026. When you are ready to move from planning to building, the Axeniaconstruction process page shows exactly how the team takes a project from initial consultation to completed construction.
FAQ
What is the first step in a home renovation project plan?
The first step is writing a written scope document that defines which rooms and elements are in scope, which are out, and what finish levels you are targeting. This document is the foundation for accurate budgeting and comparable contractor bids.
How much contingency should I budget for a renovation?
Budget a minimum of 20% of your total project cost as a contingency reserve. Homes built before 1980 warrant 25% because the likelihood of finding hidden conditions behind finished surfaces is significantly higher.
How long does a typical home renovation take to plan?
Planning a renovation from initial goal setting through permit approval typically takes 3 to 6 months for projects involving structural or mechanical changes. Starting 6 to 12 months before your target completion date is the standard recommendation.
What should a renovation contract always include?
Every renovation contract should include a detailed scope of work, a construction schedule with milestones, a milestone-based payment schedule, a written change-order process, and warranty terms covering both labor and materials.
When should I order materials for a renovation?
Order long-lead items like cabinetry, stone countertops, specialty fixtures, and appliances before your permit is approved. Fixtures and cabinetry can carry 6 to 12 week lead times, and ordering late is one of the most common causes of construction delays.
Recommended
- Best Home Renovations to Increase Property Value in 2026 – Axenia Construction
- Top Home Remodeling Tips in Maryland for 2026: Boost Value & Comfort – Axenia Construction
- Home Renovation in Alexandria, VA: Upgrade Your Home with Modern Remodeling Solutions – Axenia Construction
- Home Remodeling in Arlington, VA: Transform Your Home with Modern Renovation Solutions – Axenia Construction