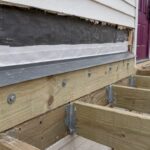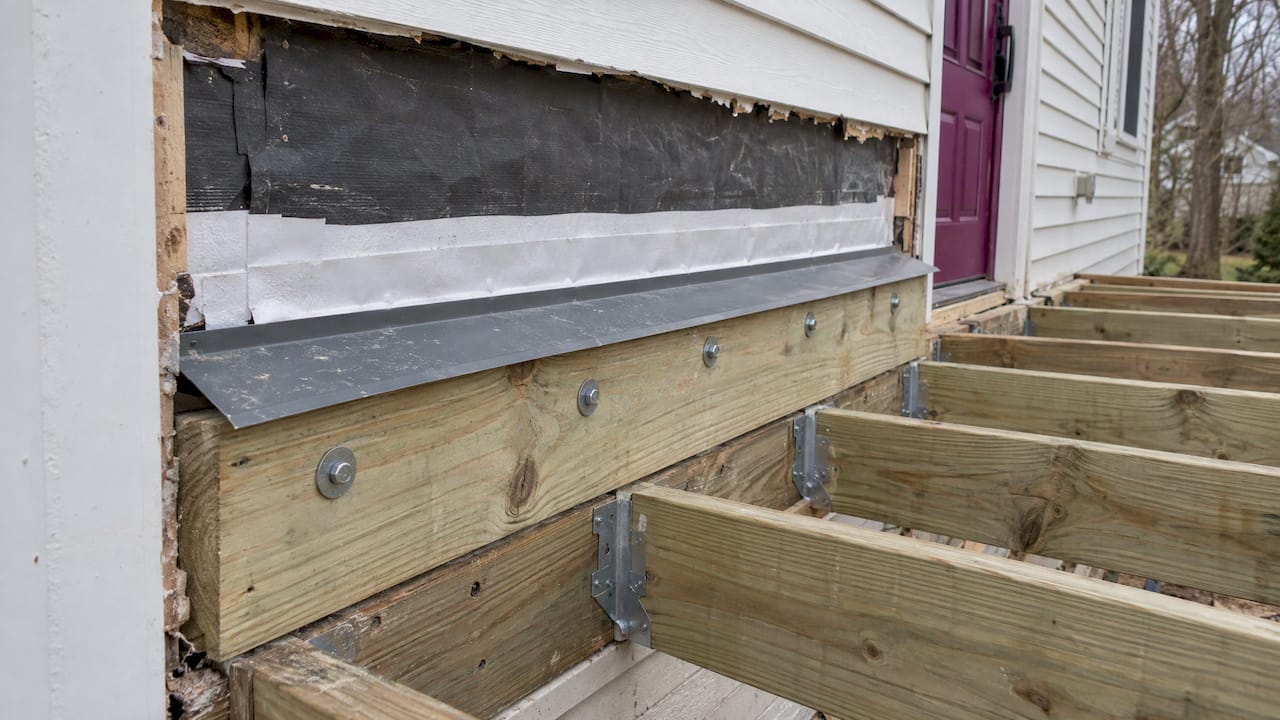
A deck ledger needs flashing, and it needs the right kind: layered, shingle-style, tied into the wall’s water barrier above, behind and below the board. Sealant alone does not do the job. Done well, flashing protects the rim joist, the wall and the connection that holds the deck to your house. In Maryland, DC and Northern Virginia, we build that detail into every attached deck, and the sections below show you exactly what it involves.
TL;DR
- Yes, a ledger needs flashing. Water behind it rots the wood, rusts the fasteners and can lead to a failed deck connection.
- Code calls for corrosion-resistant flashing at least 2 inches above the ledger, lapped into the wall’s weather barrier. Local rules in Maryland, DC and Virginia add details.
- The reliable detail is membrane on the wall, membrane over the ledger top, then cap flashing with a tall wall leg, with the siding and housewrap lapped over it.
- Avoid aluminum against copper-treated lumber, and never use caulk as a substitute for laps.
- Permits and a framing inspection are normal, so the flashing has to be right before the deck boards go down.
Table of Contents
- Why a deck ledger needs flashing
- What the code says about ledger flashing
- Choosing flashing materials
- The ledger flashing detail, step by step
- Why sealant alone fails
- Common ledger flashing mistakes
- Where our team takes this off your hands
- Our perspective on ledger flashing
- FAQ
- Sources
Why a deck ledger needs flashing
The ledger is the board bolted to your house that carries one side of the deck. It sits against the exterior wall, which is exactly where water runs down. A ledger pressed against the weather barrier acts as a horizontal dam: according to the U.S. Department of Energy’s Building America information sheet, it interrupts drainage and can direct water toward fastener penetrations. That is why careful flashing matters for both the wall and the deck.
The consequences are structural. FEMA’s deck-to-wall bulletin warns that water at the ledger can cause dry rot and corrosion of connectors, potentially contributing to deck collapse. The National Association of Deck and Railing describes the same sequence: water enters screw holes, stays against the ledger, rots the wood and rusts the screws, weakening the connection.
The wall suffers too. Water that gets behind the siding at a ledger can soak sheathing and framing for years before you see a stain inside. A deck failure usually starts with a detail nobody can see once the deck is finished, which is why the flashing deserves more attention than the decking.
What the code says about ledger flashing
The national baseline is the International Residential Code (IRC). The DCA 6 prescriptive deck guide, built on the 2015 IRC, says ledgers must be flashed or caulked to prevent water from contacting the house band joist, with corrosion-resistant flashing under IRC Section R703.8.
The IRC’s dimensions, as summarized on UpCodes, are:
- Flashing at least 2 inches vertically above the ledger.
- Either at least 4 inches horizontally beyond the ledger face, or down the ledger face at least 1/4 inch.
- An exception where a window or door sits less than 2 inches above the ledger: the flashing runs to the bottom of that opening.
- An exception to flashing where the ledger is spaced at least 1/4 inch from the exterior wall covering for drainage and ventilation.
That last exception is easy to misread. It describes a specific spaced-ledger detail, not permission to skip flashing on a ledger bolted tight to the wall.
Maryland, DC and Virginia
Counties and cities write their own deck guides on top of the model code, so the details you need depend on where the house sits.
| Jurisdiction | What its guide says about ledger flashing |
|---|---|
| Carroll County, MD | Continuous flashing with a drip edge at ledger connections to wood-framed walls. Accepted materials: copper with copper nails, stainless steel, UV-resistant plastic, rubber or G-185 galvanized steel. |
| Washington, DC | The DC Deck Guide requires continuous flashing at ledger connections to wood framing and lists copper with copper nails, stainless steel, UV-resistant plastic or G-185 galvanized steel. Siding must come off before the ledger goes on. |
| Henrico County, VA | Aluminum flashing is not allowed because it deteriorates in contact with treated wood, and the guide calls for a self-healing membrane on attached decks. |
Maryland’s Residential Code 2024, based on the 2024 IRC, has been effective since November 24, 2025, and individual counties can adopt amendments. Always confirm the current local requirements with your building department before you start. If you are weighing the permit side of a project, our guide to deck permits in Maryland walks through it, and for Northern Virginia we cover Arlington’s deck permit rules.
In DC, a framing inspection is required before deck boards are installed so the connections and flashing can be verified. Plan the schedule so the flashing is complete and visible when the inspector arrives.
Choosing flashing materials
Two layers do different work. Self-adhering membrane seals around fasteners and against the wall. Cap flashing sheds water out and away over the top of the ledger.
Metal for the cap. The DCA 6 guide specifies corrosion-resistant metal at least 0.019 inch thick or an approved nonmetallic material. Carroll County’s list, shown above, adds copper with copper nails, stainless steel, UV-resistant plastic, rubber and G-185 galvanized steel.
Watch the treated lumber. The same guide says aluminum should not be in direct contact with lumber treated with copper-containing preservatives such as ACQ, Copper Azole or ACZA. Most pressure-treated ledgers today are treated this way, which is why Henrico County bans aluminum outright. Galvanized or stainless steel avoids the question.
Membrane. Use a self-adhering, self-sealing membrane made for exterior wall flashing. Henrico’s guide specifically calls for a self-healing membrane, which closes around screws and bolts driven through it.
Fasteners and hardware. FEMA recommends compatible fasteners and stainless-steel deck connection hardware. Mixing metals in a wet location invites corrosion, so keep the whole assembly compatible.
The ledger flashing detail, step by step
This sequence follows the approach in Fine Homebuilding’s ledger guide, FEMA’s bulletin and the Building Science Corporation detail. Your local guide takes precedence where it differs.
1. Open the wall
Remove the siding or exterior finish where the ledger will sit. Both the DCA 6 guide and the DC Deck Guide require this before ledger installation. A ledger fastened through siding cannot be flashed properly, and it cannot bear on solid framing either.
This is also the moment to look at what you have. If the band joist cannot be verified, or conditions differ from the prescriptive details, the DCA 6 guide says a non-ledger deck or a full plan submission is required. Stone or masonry veneer cannot support a ledger.
2. Membrane on the wall
Apply self-adhering membrane to the wall, extending at least 1 inch above the ledger’s top edge, 2 inches below its bottom edge, and 4 inches past each end, per Fine Homebuilding. The membrane must be integrated with the water-resistive barrier (WRB, the housewrap or building paper). Building Science Corporation says the drainage plane above the ledger laps over the flashing, while the drainage plane below is tucked under the membrane, with sheathing tape sealing the membrane to the drainage plane or sheathing.
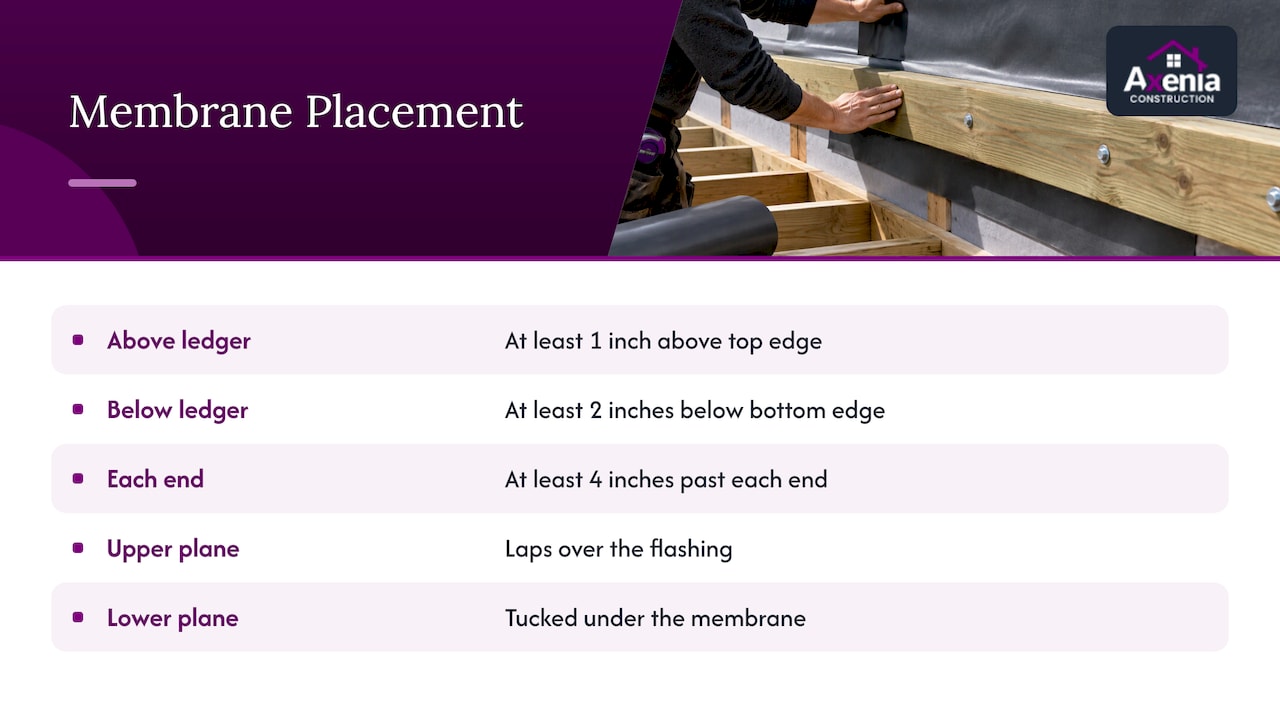
The rule is shingle logic: every layer sheds onto the layer below it, never behind it.
3. Install the ledger with a drainage gap
FEMA recommends using spacers behind the ledger to create a drainage gap. Even a small gap lets water that does get in keep moving down and out instead of pooling. Building Science Corporation also suggests treating joist ends with sealant to reduce water absorption.
Fasten the ledger with the bolts or structural screws your local deck guide specifies. Every fastener hole is a path for water, which is why the membrane goes on before and over them.
4. Membrane over the top of the ledger
Apply a second strip of membrane over the top of the ledger and about 1/2 inch down its face. This protects the top edge, where standing water would otherwise sit and where deck boards will later trap debris.
5. Cap flashing
Install metal or plastic cap flashing with a face drop of at least 1/2 inch and a wall leg at least 6 inches tall, according to Fine Homebuilding. Its example uses a 7-inch wall leg, 1-inch decking and 2 inches of siding clearance, so that the housewrap and siding overlap the wall leg with room to spare. Carroll County also requires a drip edge, so the water leaves the assembly instead of running back onto the ledger face.
A taller leg is not overkill. Decking thickness, siding clearance and the need to lap the WRB all eat into those inches.
6. Lap the weather barrier and siding
Lap the housewrap over the wall leg of the flashing, then reinstall the siding over it. Do not trap the flashing behind the siding in reverse. Check the layers from the top down: siding, WRB, flashing, membrane, and the ledger below.
7. Leave a gap at the first deck board
FEMA recommends leaving a gap between the first deck board and the flashing so water and debris can clear. Boards pushed tight to the wall hold moisture against the ledger, undoing the work behind them.
8. Thresholds
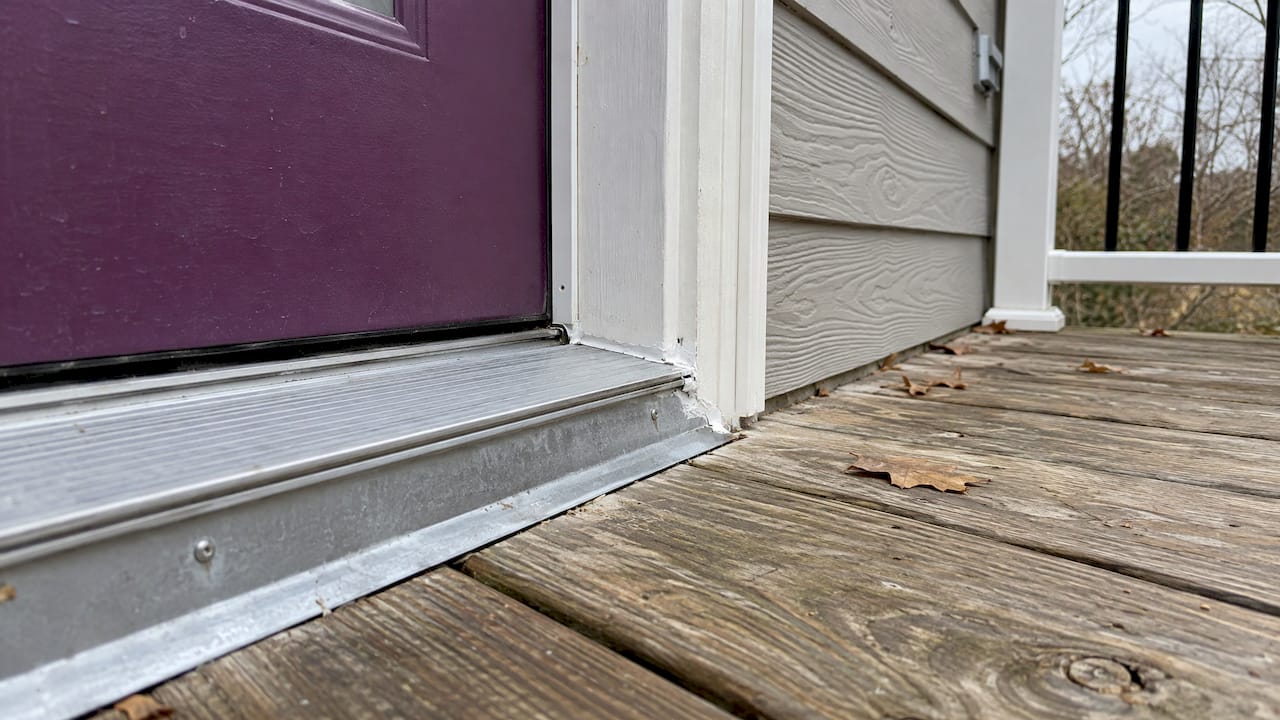
Where a door opens onto the deck, the DCA 6 guide calls for careful flashing and caulking at the threshold. This is the other place deck leaks start, and it ties into the ledger flashing, so plan the two together.
Why sealant alone fails
Caulk is a supporting player. FEMA’s guidance is that laps and drainage paths are more dependable than sealant, and that sealant should not be relied on instead of proper lapping. Sealant shrinks, cracks and loses adhesion with temperature swings, and Mid-Atlantic weather gives it plenty. A shingle-lapped assembly keeps working when the caulk ages.
Fine Homebuilding also points out that the IRC gives no prescriptive flashing measures beyond minimum metal thickness. It states the goal and leaves the method to the climate and the code official. So a minimal detail can pass and still leak. The layered approach above goes further than the minimum, and that is the point.
Common ledger flashing mistakes
- Flashing nailed through siding. Without removing the siding, nothing laps correctly.
- Aluminum on treated wood. It corrodes, sometimes within a few seasons.
- Wall leg too short. The housewrap cannot lap over it and the siding has nothing to cover.
- No membrane behind the ledger. Screw holes become the leak path.
- Caulk instead of laps. It fails first and hides the problem.
- Decking tight to the wall. Debris and moisture sit against the ledger.
- Skipping the threshold. Water gets in at the door and travels along the ledger.
The cost of these mistakes shows up late. A deck can look sound while the rim joist behind the ledger is wet. When we replace older decks, the ledger area is one of the first places to check, and it is part of why deck replacement costs in Maryland can surprise owners when hidden rot turns up.
Where our team takes this off your hands
Flashing a ledger touches framing, siding, weather barrier and permitting at once, and it gets covered by decking within days. Axenia Construction is a licensed, women-owned general contractor in Rockville, MD, and we build and renovate decks and porches for homeowners in Maryland, DC and Northern Virginia. Our positioning rests on meticulous project management, transparent communication and local permitting expertise in those three jurisdictions, which is what a ledger detail needs: someone who knows what the local guide requires and who coordinates the inspection before the boards go down.
If you are planning a new attached deck, replacing a worn one or want the ledger connection of an existing deck assessed as part of a project, see our decks and porches services or reach us through the Axenia Construction site. For a deck in Montgomery County, our Rockville deck builder page has the local details.

Our perspective on ledger flashing
We think of the ledger as the most important connection on any attached deck, and the least visible one. Owners judge a deck by its boards and railings, but the ledger decides whether the deck is still safe in fifteen years.
That is why we treat flashing as part of the structure, not a finishing touch. A deck should be planned from the wall outward: how the weather barrier will lap, where the siding comes off, what the inspector needs to see, and how the door threshold ties in. Those decisions happen before anyone buys lumber.
It is also why we work design-build and keep permitting in-house knowledge across Maryland, DC and Northern Virginia. Each jurisdiction words its ledger flashing requirement a little differently, and a contractor who works in all three does not have to guess. Clear communication matters as much: we want you to know what is behind your deck boards before they cover it.
Arienne
FAQ
Does a deck ledger need flashing?
Yes. Model code and local deck guides require the ledger to be protected from water contact with the house band joist, and most local guides require continuous corrosion-resistant flashing at the connection. Without it, water can rot the ledger and corrode its fasteners.
What flashing should I use for a deck ledger?
Use a self-adhering membrane against the wall and over the ledger top, then metal or approved plastic cap flashing at least 0.019 inch thick if metal. Copper, stainless steel and G-185 galvanized steel are on local approved lists. Avoid aluminum against copper-treated lumber.
How far above the ledger should flashing extend?
The IRC summary calls for at least 2 inches vertically above the ledger. A wall leg of 6 inches or more is common practice, as described by Fine Homebuilding, so the housewrap and siding can overlap it.
Can I use caulk instead of flashing?
No. Some guides mention flashing or caulking, but FEMA’s guidance is that laps and drainage paths are more dependable than sealant. Treat caulk as a supplement to a lapped flashing assembly, not a replacement.
Does my deck need an inspection of the flashing?
Usually, yes. Washington, DC requires a framing inspection before deck boards are installed so connections and flashing can be verified. Other jurisdictions have their own inspection steps, so check with your local building department.
Sources
- DCA 6 Prescriptive Residential Wood Deck Construction Guide
- BSC Information Sheet 304, Integrating Deck Ledger Board with Drainage Plane (U.S. Department of Energy)
- Info-304: Integrating Deck Ledger Board with Drainage Plane (Building Science Corporation)
- FEMA Deck-to-Wall Flashing bulletin
- Pro Fixes for Fighting Deck Failure (NADRA)
- Carroll County Residential Deck Guide
- District of Columbia Deck Guide
- Henrico County Wood Deck Construction Guide
- Ledger Flashing (UpCodes)
- Maryland Residential Code 2024 (UpCodes)
- How to Install and Flash a Deck Ledger (Fine Homebuilding)